Map interaction client/Map interaction
This section describes how to interact with Maria User control and Maria map layer functionality.
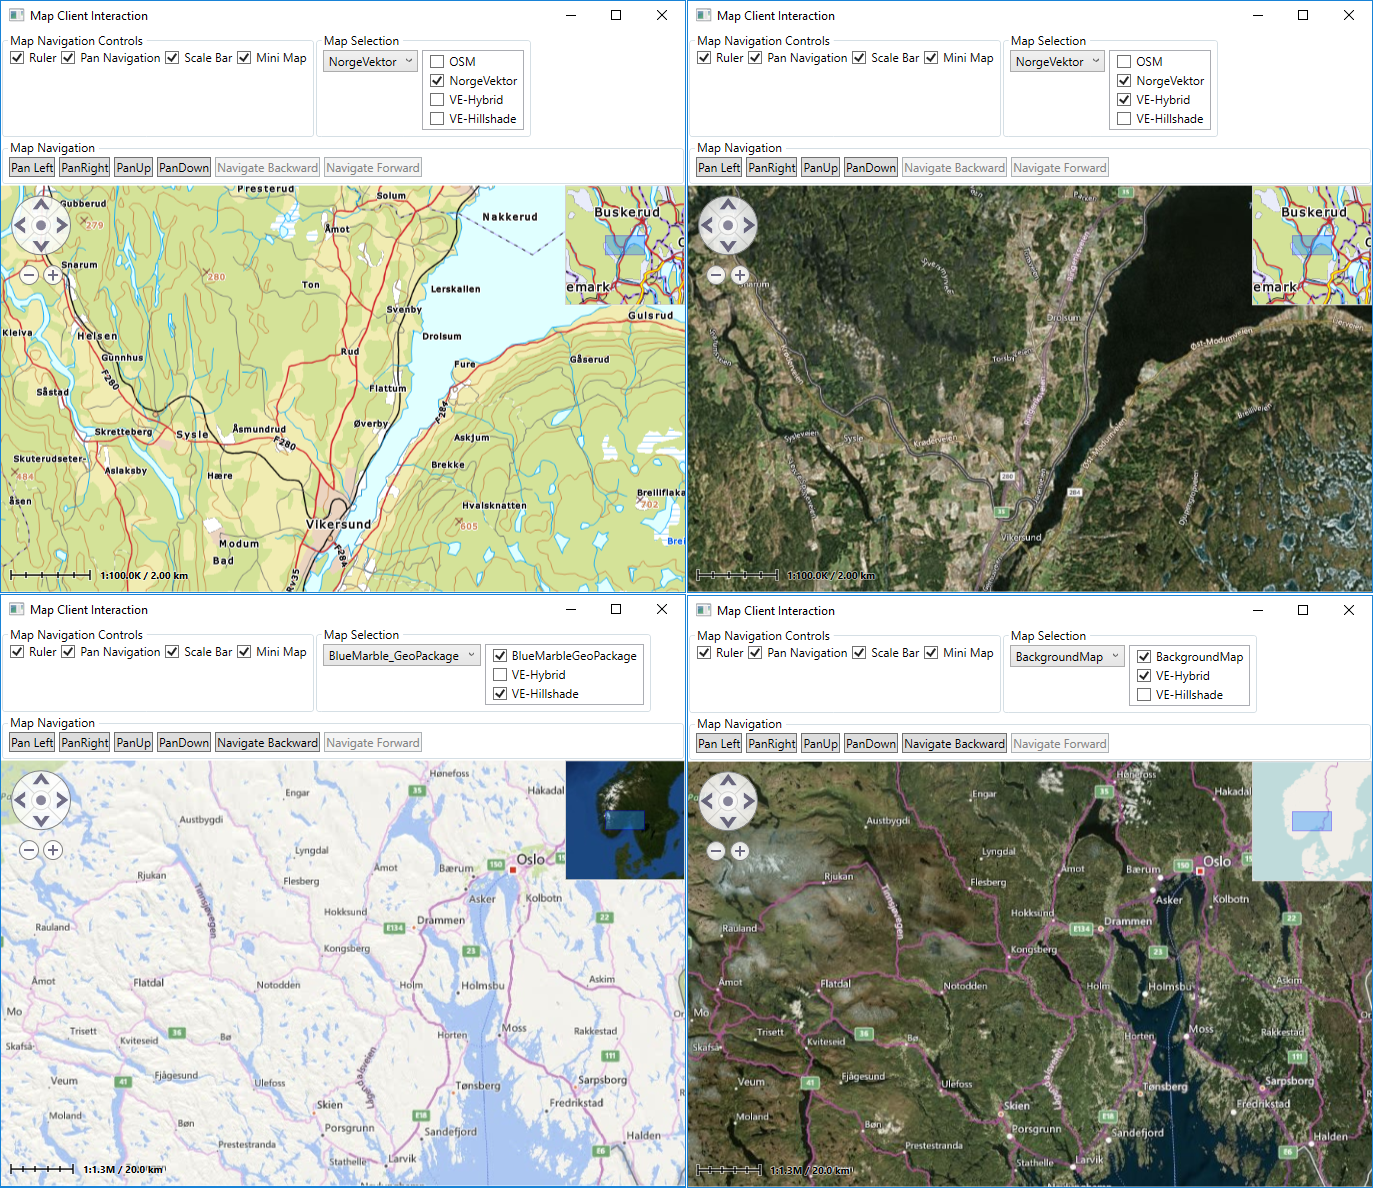
MariaUserControl contains built-in navigation controls and navigation commands.
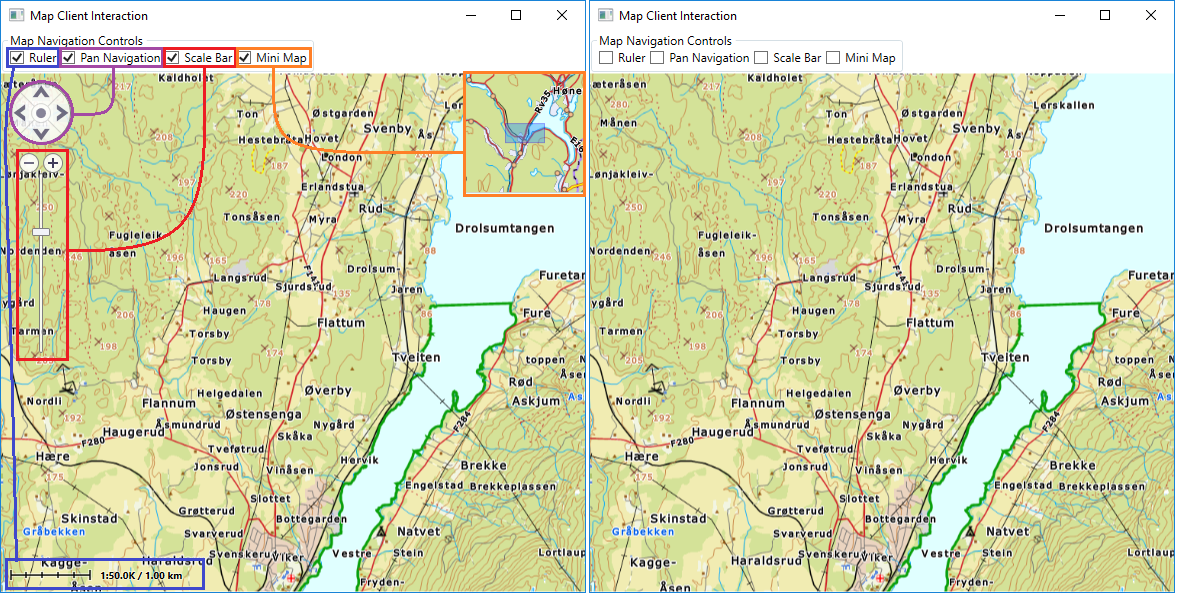
To enable/disable navigation controls, add four check boxes (Ruler, Pan Navigation, Scale Bar and Mini Map) - and bind them to MariaUserControl.
<CheckBox Content="Ruler" ToolTip="Ruler"
              Name="IsRulerVisible"
              IsChecked="{Binding IsRulerVisible, ElementName=MariaCtrl}" />
<CheckBox Content="Pan Navigation" ToolTip="Pan Navigation"
              Name="IsPanNavigationVisible"
              IsChecked="{Binding IsPanNavigationVisible, ElementName=MariaCtrl}" />
<CheckBox Content="Scale Bar" ToolTip="Scale Bar"
              Name="IsScaleBarVisible"
              IsChecked="{Binding IsScaleBarVisible, ElementName=MariaCtrl}" />
<CheckBox Content="Mini Map" ToolTip="Mini Map"
              Name="IsMiniMapVisible1"
              IsChecked="{Binding IsMiniMapVisible, ElementName=MariaCtrl}" />
You should now be able to toggle the display of the navigation tools.
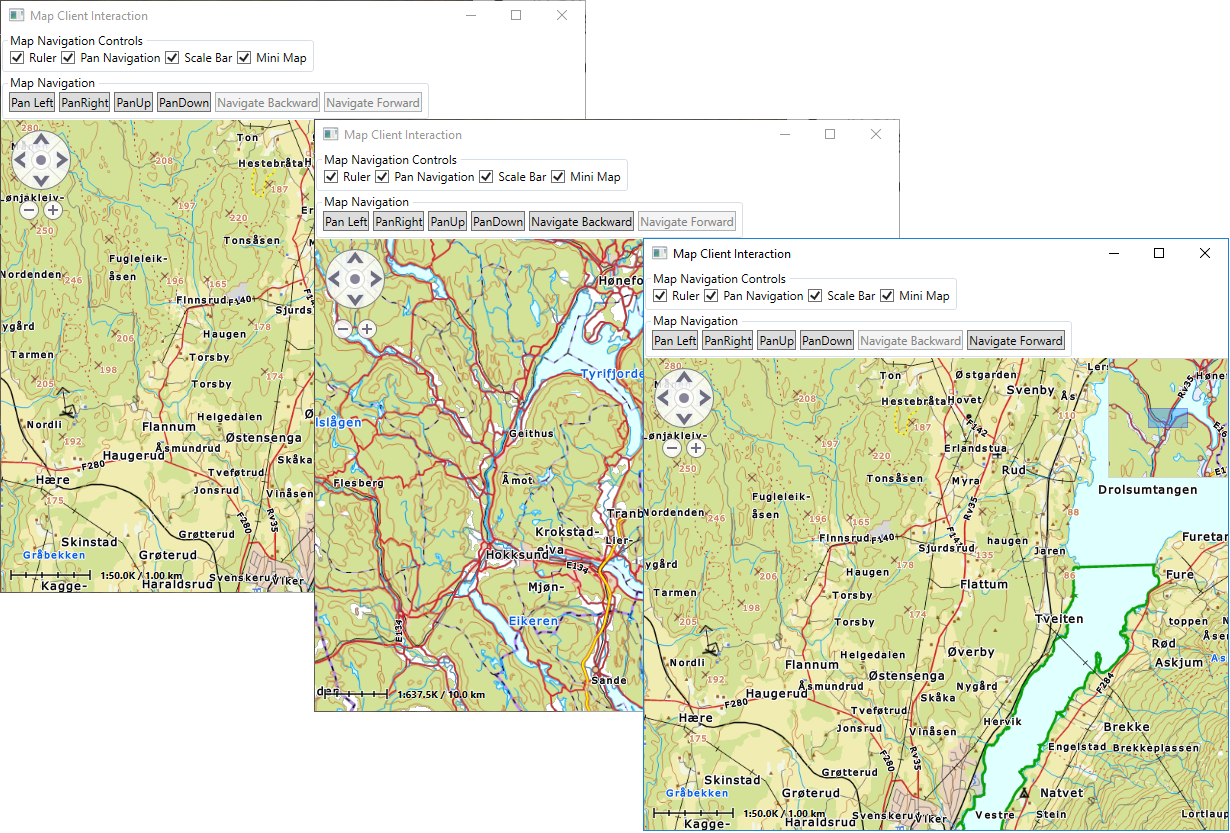
To access the navigation commands directly, add four pushbuttons (Pan Left, Pan Right, Pan Up, Pan Down) to your main window (wrap panel) -- and bind them to the MariaUserControl.
<Button Content="Pan Left" ToolTip="Pan Left"
        Name="PanLeftCommand"
        Command="{Binding PanLeftCommand, ElementName=MariaCtrl}" />
<Button Content="PanRight" ToolTip="PanRight"
        Name="PanRightCommand"
        Command="{Binding PanRightCommand, ElementName=MariaCtrl}" />
<Button Content="PanUp" ToolTip="PanUp"
        Name="PanUpCommand"
        Command="{Binding PanUpCommand, ElementName=MariaCtrl}" />
<Button Content="PanDown" ToolTip="PanDown"
        Name="PanDownCommand"
        Command="{Binding PanDownCommand, ElementName=MariaCtrl}" />
Add the following navigation properties to your map interface class (MapViewModel)
public ICommand NavigateBackwardCommand
{
    get { return _mapLayer.NavigateBackwardCommand; }
}
public ICommand NavigateForwardCommand
{
    get { return _mapLayer.NavigateForwardCommand; }
}
Then, add pushbuttons (Navigate Backward and Navigate Forward) for stepping between the previous views.
<Button Content="Navigate Backward" ToolTip="Navigate Backward"
        Name="NavigateBackwardCommand"
        Command="{Binding MapViewModel.NavigateBackwardCommand}" />
<Button Content="Navigate Forward" ToolTip="Navigate Forward"
        Name="NavigateForwardCommand"
        Command="{Binding MapViewModel.NavigateForwardCommand}" />
You should now be able to navigate the map by selecting your own buttons.
Observe that the forward/backward navigation buttons are disabled until you have panned or zoomed to have views to go to.
Changing map source
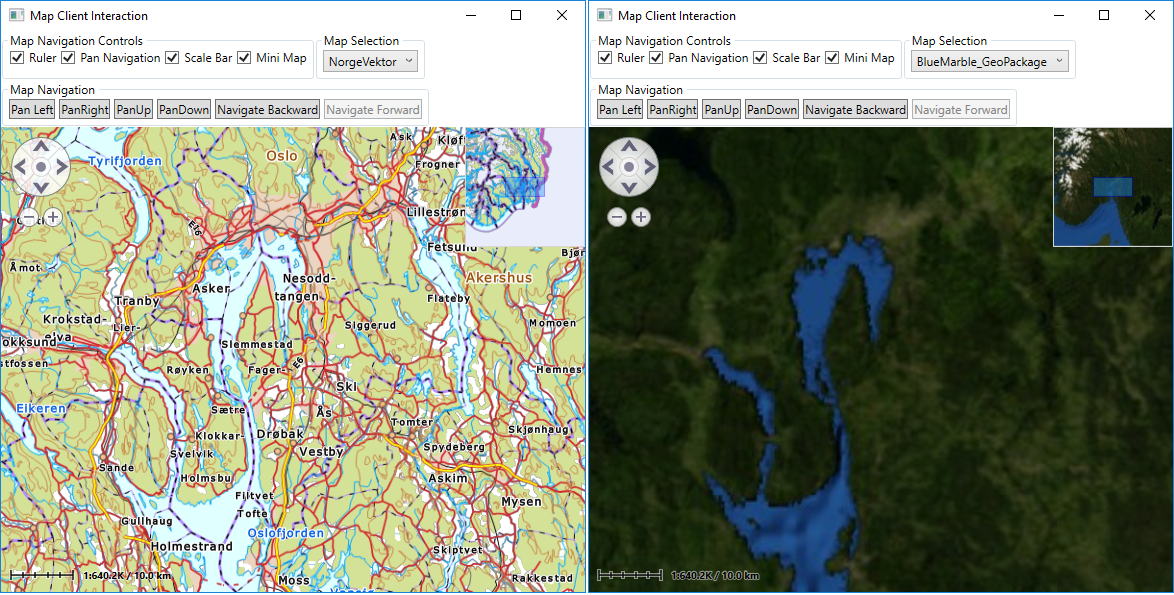
When several map templates are available, you can include selection of map to use by adding the following properties to MapViewModel
- Add a combo box to present available map templates and select the desired.
- Add necessary properties to handle the selection.
MainWindow:
<GroupBox Header="Map Selection" Visibility="Visible">
    <StackPanel Orientation="Horizontal">
        <ComboBox Name="cmbActiveMap" Height="Auto" VerticalAlignment="Top" Margin="2"
                  ItemsSource="{Binding MapViewModel.AvailableMapTemplateNames}"
                  SelectedItem="{Binding MapViewModel.ActiveMapTemplateName}"
                  IsSynchronizedWithCurrentItem="true"
                  Width="Auto" />
    </StackPanel>
</GroupBox>
MapViewModel:
private Dictionary<string, MapTemplate> _availableMapTemplateDictionary = new Dictionary<string, MapTemplate>();
public IEnumerable<string> AvailableMapTemplateNames
{
    get
    {
        return _availableMapTemplateDictionary.Keys.ToList();
    }
}

public string ActiveMapTemplateName
{
    get
    {
        if (_mapLayer?.ActiveMapTemplate != null)
            return _mapLayer.ActiveMapTemplate.Name;
        return "";
    }
    set
    {
        MapTemplate template = null;

        if (_availableMapTemplateDictionary.ContainsKey(value))
        {
            template = _availableMapTemplateDictionary[value];
        }
        else if (_availableMapTemplateDictionary.Any())
        {
            template = _availableMapTemplateDictionary.Values.First();
        }

        _mapLayer.ActiveMapTemplate = template;
        MiniMapLayer.ActiveMapTemplate = template;
        NotifyPropertyChanged(() => ActiveMapTemplateName);
    }
}
Initialize AvailableMapTemplateNames before setting the ActiveMapTemplate, in OnMapLayerInitialized:
private void OnMapLayerInitialized()
{
    . . .

    foreach (var template in _mapLayer.ActiveMapTemplates)
    {
        _availableMapTemplateDictionary.Add(template.Name, template);
    }
    NotifyPropertyChanged(() => AvailableMapTemplateNames);

    _mapLayer.ActiveMapTemplate = PreferredMapTemplate();
}
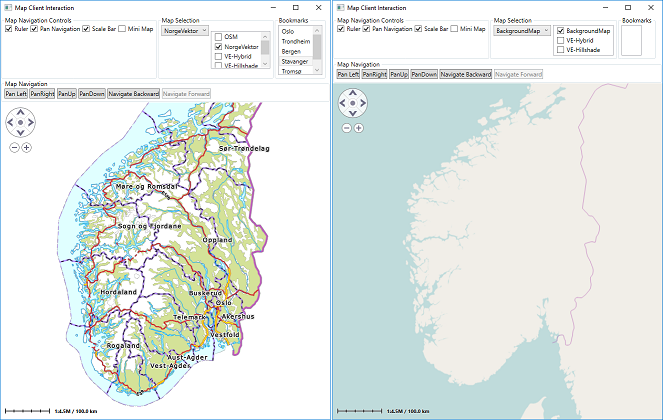
You should now be able to switch between available map templates. Please note that the map templates above are displayed in different scales.
Selecting map sub layers
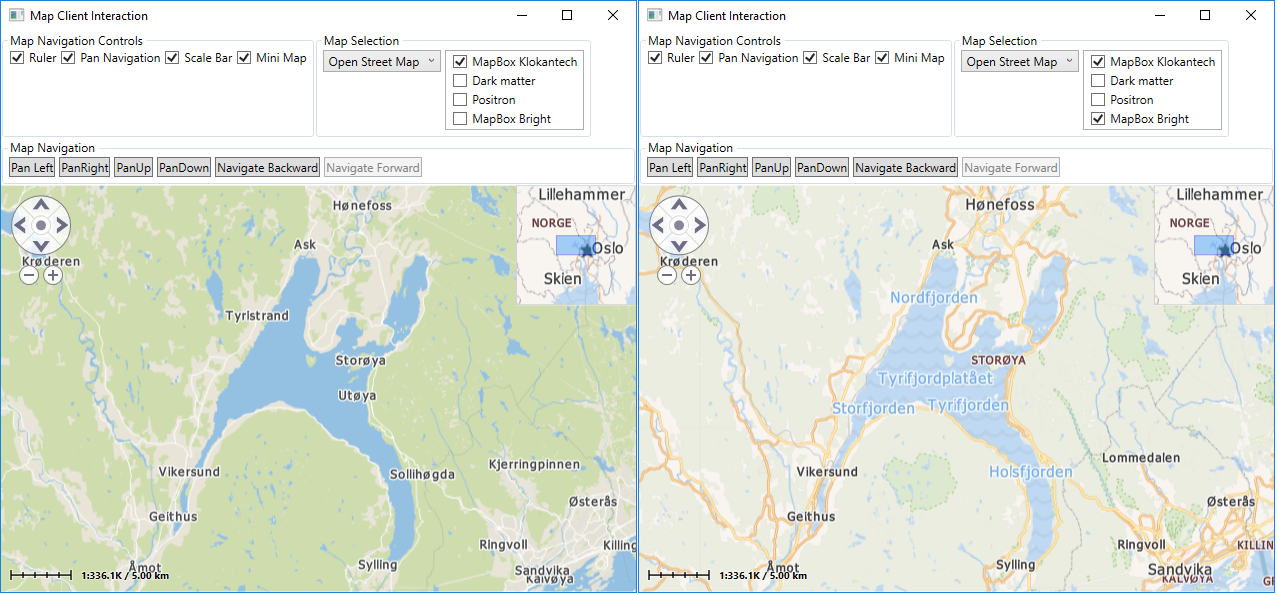
The map templates may be defined with several sub-layers, e.g. the map information itself, and additional elevation shading.
You can control the sub layer display through the map layer, IMariaMapLayer.MapDataLayers property.
To select sub-layers to be displayed, first add a sub layers property to your view model:
public ObservableCollection<IRasterLayerData> MapSubLayersDisplay
{
    get { return new ObservableCollection<IRasterLayerData>(_mapLayer.MapResources.RasterLayerData); }
}
Then, add a list box with check items your XAML:
<ListBox Name="lstSubLayers" Height="Auto" Margin="2" MinWidth="40"
         ItemsSource="{Binding MapViewModel.MapSubLayersDisplay}" >
    <ListBox.ItemTemplate>
        <DataTemplate>
            <CheckBox Width="Auto"
                      Content="{Binding Path=Name}"
                      IsChecked="{Binding Path=Visible, Mode=TwoWay}" />
        </DataTemplate>
    </ListBox.ItemTemplate>
</ListBox>
To ensure that the sub layer display is updated when a new map source is selected, add the following line to the active map name setter:
public string ActiveMapTemplate
{
    . . .
    set
    {
        . . .
        NotifyPropertyChanged(() => MapSubLayersDisplay);
    }
}
You should now be able to select between different sub layers in your map templates.
Adding Web Maps
- Note
- For this part you will need to add the TPG.GeoFramemwork.WebMaps.WrapperClient NuGet package.
Do the following modifications:
- Add a mapDataProvidor parameter, type IMapDataProvider, to the MapViewModel constructor, and create a WebMapsClientManager.
- Create two web layers, Virtual Earth Hybrid and Virtual Earth Hillshade, and add them to the WebMapsClientManager
- Add update of the web layers when the active template is changed.
MapViewModel:
. . .
private WebMapsClientManager _webMapsClientManager;
private IVirtualEarthClient _veHybrid;
private IVirtualEarthClient _veHillshade;
. . .
public MapViewModel(IMariaMapLayer mapLayer, IMariaMapLayer miniMapLayer, IMapDataProvider mapDataProvider)
{
    . . .
    if (mapDataProvider != null)
    {
        _webMapsClientManager = new WebMapsClientManager(mapDataProvider, _mapLayer.MapResources);
    }
}
. . .
private void OnMapLayerInitialized()
{
    . . .
    if (_webMapsClientManager != null)
    {
        _veHybrid = new WebMapsClientFactory().CreateVirtualEarthClient("VE-Hybrid");
        _veHybrid.Visible = false;
        _veHybrid.Style = VirtualEarthStyles.Hybrid;
        _webMapsClientManager.AddClient(_veHybrid);
        _veHybrid.Update();

        _veHillshade = new WebMapsClientFactory().CreateVirtualEarthClient("VE-Hillshade");
        _veHillshade.Visible = false;
        _veHillshade.Style = VirtualEarthStyles.Hillshade;
        _webMapsClientManager.AddClient(_veHillshade);
        _veHillshade.Update();
    }
    NotifyPropertyChanged(() => MapSubLayersDisplay);
}
. . .
public string ActiveMapTemplateName
{
    . . .
    set
    {
        . . .
        _veHillshade?.Update();
        _veHybrid?.Update();
        NotifyPropertyChanged(() => MapSubLayersDisplay);
    }
}
. . .
MariaWindowViewModel:
. . .
public MariaWindowViewModel()
{
    . . .
    var webMapDataProvider = _mapLayerManager.MapDataProviders.FirstOrDefault(item => item.Key == MapServiceType.WmsService).Value;
    MapViewModel = new MapViewModel(_mapLayer, _miniMapLayer, webMapDataProvider);
    . . .
}
. . .
The added web layers should now be available for all map templates.
Bookmarks
Display pre-defined bookmarks
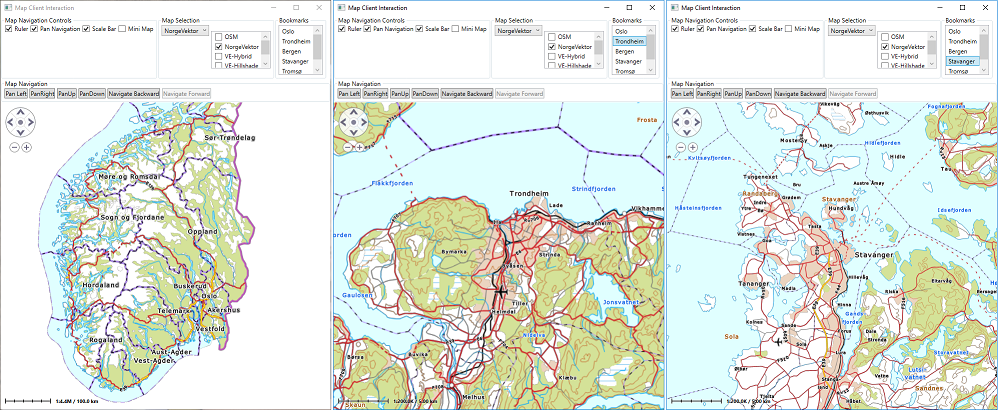
Bookmarks are shortcuts to specific map sections, specified by map scale and center position. Predefined may be available from the map service for selected map sources. Available bookmarks are listed in the map layer Bookmarks property, and activated by setting the ActiveBookmark property.
In the MapLayerViewModel, create properties for bookmark interaction:
public Bookmark ActiveBookmark { set { if (value != null) _mapLayer.ActiveBookmark = value; } }
public ObservableCollection<Bookmark> Bookmarks { get { return _mapLayer.Bookmarks ; } }
Then, add a list box with bookmark items for display and selection of bookmarks:
<ListBox Name="lstBookmarks" MinWidth="40" MaxHeight="100" Margin="2"
         ItemsSource="{Binding MapViewModel.Bookmarks}"
         SelectedItem="{Binding MapViewModel.ActiveBookmark, Mode=OneWayToSource}">
    <ListBox.ItemTemplate>
        <DataTemplate>
            <TextBlock Width="Auto" Height="Auto" Margin="0"
                       Text="{Binding Path=Name}" />
        </DataTemplate>
    </ListBox.ItemTemplate>
</ListBox>
You should now be able to display different map sections by selecting different bookmarks.
- Note
- different map sources may have different bookmarks.
Adding/removing local bookmarks
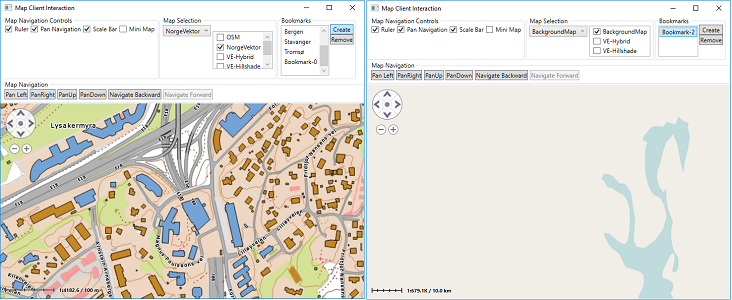
Bookmarks can be added or removed locally for the map client in runtime.
Add buttons for adding and removing bookmarks to your main window xaml:
<Button Content="Create" Command="{Binding MapViewModel.AddBookmark}"/>
<Button Content="Remove" Command="{Binding MapViewModel.RemoveBookmark}" />
Implement the command handlers in the view model:
public ICommand RemoveBookmark { get { return new DelegateCommand(x => OnRemoveBookmark()); } }
private void OnRemoveBookmark()
{
    _mapLayer.Bookmarks.Remove(_mapLayer.ActiveBookmark);
}

public ICommand AddBookmark { get { return new DelegateCommand(x => OnAddBookmark()); } }
private void OnAddBookmark()
{
    _mapLayer.Bookmarks.Add(new Bookmark
    {
        Name = "Bookmark-",
        Position = new Tuple<double, double>(CenterPosition.Lat, CenterPosition.Lon),
        Scale = CenterScale,
        MapSignature = ActiveMapTemplate.Name
    });
}
You should now be able to add and remove your own bookmarks!
- Note
-
- Locally added bookmarks are not preserved when changing map template.
