Maria globe client: Difference between revisions
Jump to navigation
Jump to search
(→�) |
(→�) |
||
| (34 intermediate revisions by 2 users not shown) | |||
| Line 1: | Line 1: | ||
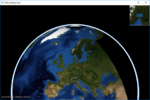
[[File:Globe-3D.PNG|right|thumb|Maria Globe Client]] | |||
These pages describe how to create a Maria GDK map client utilising '''''MariaGlobeMapControl''''' with 2D and 3D visualisation of map, tracks and draw objects. | |||
== General == | == General == | ||
; Note | ; Note | ||
:* You will need to include the '''''TPG. | :* You will need to include the '''''TPG.MariaGDK3D''''' NuGet package. (Currently available Teleplan Globe internal only) | ||
:: For more info, see [[Development requirements#Loading Maria GDK Packages| Loading Maria GDK, NuGet Packages]] | |||
:* Sample code is found in the '''''MariaGlobeClient''''' project, in the '''''Sample Projects''''' solution. | :* Sample code is found in the '''''MariaGlobeClient''''' project, in the '''''Sample Projects''''' solution. | ||
:* Note that the sample code is specifying the service connections in ''code'', and not by '''''app.config'''''. | :* Note that the sample code is specifying the service connections in ''code'', and not by '''''app.config'''''. | ||
:* For general troubleshooting, see [[Development_troubleshooting|Development troubleshooting]] | :* For general troubleshooting, see [[Development_troubleshooting|Development troubleshooting]] | ||
== | == Sections == | ||
;The following main topics are handled: | |||
{| class="wikitable" | {| class="wikitable" | ||
|- | |- | ||
| | | | ||
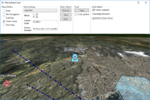
[[ | ;1. [[Maria_globe_client/Utilising_the_globe_control|Utilising the globe control]] | ||
| | | | ||
[[File: | [[File:Globe_First-3D.PNG|150px|link=Maria_globe_client/Utilising_the_globe_control]] | ||
|- | |- | ||
| | | | ||
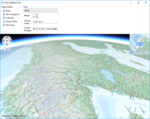
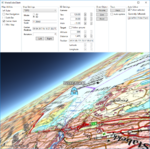
[[File: | ;2. [[Maria_globe_client/Map_interaction|Map interaction]] | ||
| | |||
[[File:Map_Pref_3D.PNG|150px|link=Maria_globe_client/Map_interaction]] | |||
|- | |||
| | | | ||
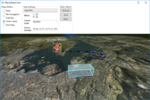
[[ | ;3. [[Maria_globe_client/Draw_object_interaction|Draw object interaction]] | ||
| | |||
| | [[File:DrawObjects_3D.PNG|150px|link=Maria_globe_client/Draw_object_interaction]] | ||
|- | |- | ||
| | | | ||
[[File: | ;4. [[Maria_globe_client/Track_interaction|Track interaction]] | ||
| | |||
[[File:Track_3D.PNG|150px|link=Maria_globe_client/Track_interaction]] | |||
|- | |||
| | | | ||
[[ | ;5. [[Maria_globe_client/Auto_follow|Auto follow]] | ||
| | |||
| | [[File:Auto_follow_track_3D.PNG|150px|link=Maria_globe_client/Auto_follow]] | ||
: | |||
|- | |- | ||
| | | | ||
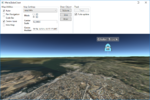
;6. [[Maria_globe_client/Advanced_map_settings|Advanced map settings]] | |||
| | |||
[[File:3D_Set_P15_Y120_R30_af.png|150px|link=Maria_globe_client/Advanced_map_settings]] | |||
| | |||
|} | |} | ||
[[Category:Creating applications | [[Category:Creating applications]] | ||
Latest revision as of 14:58, 28 October 2019

These pages describe how to create a Maria GDK map client utilising MariaGlobeMapControl with 2D and 3D visualisation of map, tracks and draw objects.
General
- Note
-
- You will need to include the TPG.MariaGDK3D NuGet package. (Currently available Teleplan Globe internal only)
- For more info, see Loading Maria GDK, NuGet Packages
- Sample code is found in the MariaGlobeClient project, in the Sample Projects solution.
- Note that the sample code is specifying the service connections in code, and not by app.config.
- For general troubleshooting, see Development troubleshooting
Sections
- The following main topics are handled
|
| |
|
| |
|
| |
|
| |
|
|
|
|